Showing posts with label craft. Show all posts

Friday, May 25, 2018

May the Fourth

It's everyone's favorite celestial holiday, May the Fourth!  So in Star Wars style, we created fun crafts to celebrate the Lucas Legacy.
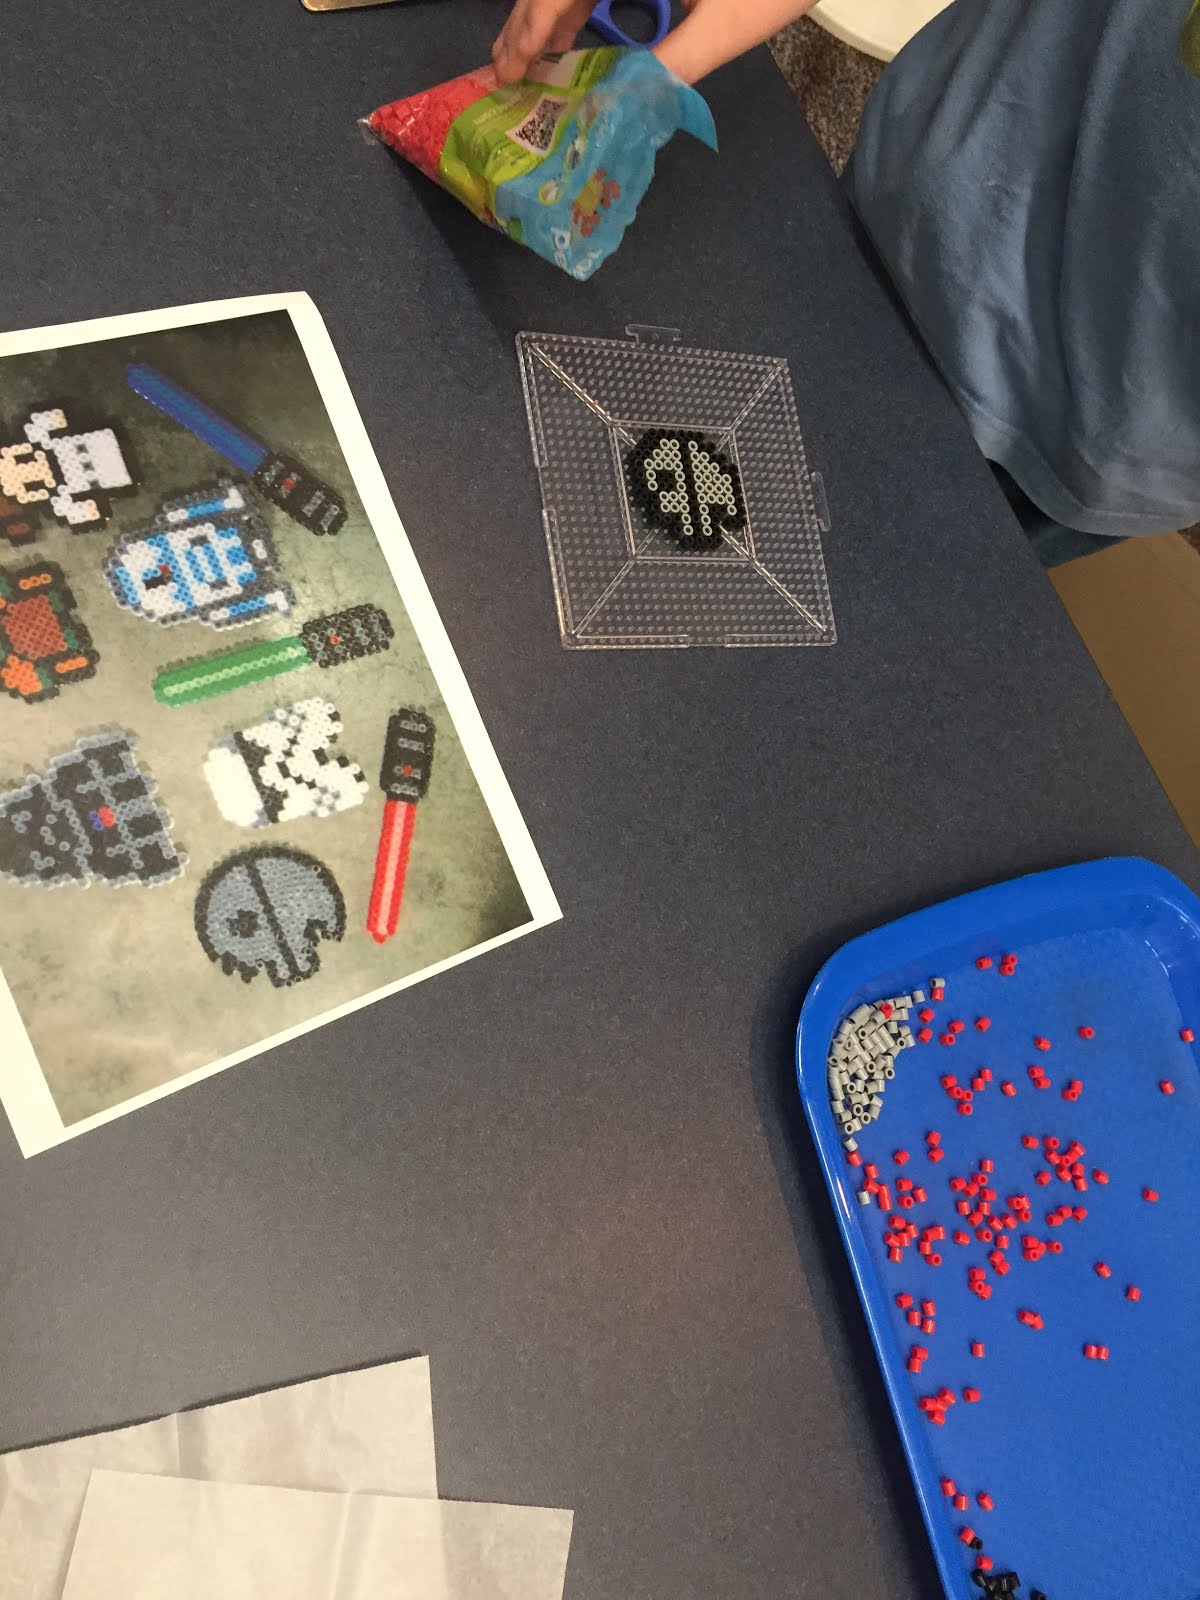
Perler R2D2
A local organization donated two large buckets of Perler beads a few months ago, so I have wanted to test the teen waters with this craft.  May Fourth became the obvious answer as I perused the internet for image inspiration.
What is That?
There are so many Star Wars characters and movies, I just can't keep up.  Okay...confession time...I've only eve watched Episode III and half of The Empire Strikes Back, so I leaned heavily on internet inspiration and student explanation.
Finalized Fun
These characters look great with a little attention to color change details.  R2D2 is my favorite!
Light Sabers in Any Color
These colorful light sabers were simple to sample and lots were made in the time we played.

Icy Sabers
For a fun way to cool down the action, we had Icy Sabers.  I used felt and hot glue to create Light Saber Coozies.  This was a great way to send everyone off into the galaxy.
Go Nuts for Donuts
The option to create something non-Star Wars led to this tasty doughnut.  Homer Simpson approves!

This wraps up another First Friday Art Club at the Southeast Steuben County Library.  
Check back in June to see what we've been making!
Totally Tubular!
Let's get Totally Tubular in June by Printing with Potatoes (and possibly some other vegetables).  Printmaking has never been so easy.  See you soon!

May the Force be With You
This message has been Chewy approved.
xo,
Erica


Tuesday, August 9, 2016

Recycled Creations with Kimberly Canale

Recycled Creations
We rummaged through the recycling cans to prepare for Recycled Creations with Kimberly Canale.  Taking used soda cans, spray paint, glass gems and a crimping tool, flowers and suns popped up by the end of class!

Kimberly Canale original Pop Can Flower
I encountered these adorable lawn decorations at a local craft fair and asked Kimberly if she would work with First Friday Art Club to make more. Collecting trash over several weeks, I had a stash of soda cans ready to be bloomed.  There were options to create a flower and a sun for this project.  The sun was a more difficult endeavor, but so pretty!! 
A sun in process
To make these, cut off the top of the can.  This tutorial from Make It Easy Crafts reveals the steps to make a spinner.  This tutorial will guide you through the same method we used to make the flowers and suns.
Make It Easy Crafts flower tutorial is absolutely adorable! 
Ask an adult to help get the can cut clean and even, so there are no metal bits to snag your skin.  The can without the top resembles a cup.  Cut strips down the sides of the can from top to bottom.  These strips will be petals for flowers or rays for suns.

Step 4 from Make It Easy Crafts
The images from the Make It Easy Crafts tutorial are for a flower.  If making a sun, create more "petals" to be sun rays.
The tricky part begins
The tricky part begins by folding the strips at 45 degree angles closest to the bottom of the can, which is now becoming the center of the sun.
Roll the rays
Roll each "ray" toward the center of the sun.  Roll these strips as tightly as possible.  Be sure to roll so that the color of the can is concealed, unless you choose to use the color to your advantage.

Using the original logo can reveal a cool design or pattern
Once the rays are rolled, all that is needed is a little paint to unify the look of the sun to your preference.  Adding  a glass gem once the sun is painted gives another bit of pizzazz.
final product
These suns can go in the ground by gluing a post to the back.  We hammered holes in one of the rays and added string to hang these in windows or from the ceiling.
There was time left to make flowers, but they were made too quickly for me to get pictures.

Another option to create something useful with recycled materials is a mini basket.
Soda cans and plastic bag strips
There was not enough time to create these mini baskets.  I will save this activity for December, when we Make and Bake Gifts for the holiday season.

Check back next month to see what we make in our Block Printing lesson.
Thanks for visiting!
See you again soon
~erica


Tuesday, May 10, 2016

Hidden in Plain Sight with Wynn Yarrow

On May 6, the First Friday Art Club made miniature books with a special guest artist.  Wynn Yarrow is a local artist with a broad portfolio.  She is represented by the West End Gallery, located on Market Street in Corning.  Wynn came prepared with her pile of crafting supplies and took over the community room for the class.
Table O'Craft-Color-Creation
This group was very excited to have control over so many beautiful and colorful supplies.  It's refreshing to watch the creative process as a spectator rather than the instructor.  
Each budding artist ventured in their own direction, from imagery to words.  
Abstract imagery on the cover
Whether images were abstract or representational, the art came directly from the soul.  Students were thoughtful in their creations, considering that Mother's Day was pending.  Lucky moms had miniature books made just for them.
Mini Books for Mom
Some students enjoyed creating as many mini masterpieces as possible, with no intention of giving them as gifts.
Multiple Mini Books
Ribbon book marks were taken to another level and became beaded beauties.
This marker weighed more than the book!
A first time book maker created a comic book.
Comic book made before Free Comic Book Day
By the end of an hour and a half session, each of the nine students made at least 1 Hidden Treasure to be cherished in secret or shared as a gift.  These items were made into necklaces, pins, bracelets, or simple mini-books.
A productive afternoon
Wynn Yarrow will return to the Southeast Steuben County Library in October to teach three book making classes to adults.  Please check the calendar this fall or call ahead to register.

In June, young adult students will learn how to make stencils and etch glass with a liquid etching cream.  The work created from this class will be on display for the month of June to dress the library in crystal in honor of the Glass Art Society annual conference being held in our Crystal City.
See you again next month!


Tuesday, December 16, 2014

Make & Bake

That time of year has come and gone again.  Make & Bake is a program combining Teen Cooking Club and First Friday Art Club into a 2 hour creation fest.  I remember being too young to work and lacked enough craft supplies to make cool things for my friends and family.  Therefore, I scramble through the year for supplies necessary for my teens to make marvelous treasures for those they love.

This year we hosted a special collaboration with Amy Ruza from The Rockwell Museum for attendees to make ceramic ornaments for the holidays.  Although I had several tables set up for various crafts, the ceramic ornaments table stole the spotlight!

The flurry of activity gave way to these:
The tough part of making ceramics is waiting for them to be fired (not like what Donald Trump does to people on The Apprentice!).  We may not have these ready in time for Christmas, but I think gifts are extra fun when the holiday is passed, but there is still something special to give.

Along with these ceramic specialties, there were Snow Bottles to create.

Wine bottles look extra elegant when spray painted and dipped in Epsom salt.  The inspiration came from this blog.  I sourced plain bottles and was very happy not to peel off labels, etc.  We drew in hot glue as a resist for the spray paint.  Then sprayed white primer, followed by spray adhesive and Epsom salt.  The hot glue can be peeled off to reveal the clear glass once everything is dry.  I added LED lights to mine for a festive effect.

Hand sewing skills were required for these cute handwarmers.
Some kids got creative with the fabric designs.  I wish these were made for me!

Scented pine cones were another option, although the ceramics took away any interest in natural objects.
After 1 hour of baking out any bugs, spritz the cones with essential oil water.  We broke tradition and used oil of Wintergreen.  Mmm!

These yummy Salted Caramel Turtle Thumbprint Cookies were a special treat made by me, because we simply ran out of time.  While the kids created, I baked!  These are so fabulous, go ahead and bake them, but please, please, PLEASE share with me!!!

Now you have the sources to make your own hand made gifts for your loved ones.

Merry Christmas!

Love, Erica


Thursday, November 13, 2014

Leather Pouches in Honor of Native American Heritage Month

This program was a "day off of school" activity on Veteran's Day.  Registered attendees each experimented with leather making and took home a wonderful keepsake.  This was not a First Friday Art Club event, but artistic nonetheless.  Therefore, I share with you the great projects we created.

All the leather for this program was generously donated by Aurora Shoe Company.  Aurora shoes are so soft and comfortable and Made In the U.S.A.  We are proud to have been given such great quality product to make these pouches.  Thanks ASC!!!


Instructions for a Needle Case are found on Native Tech