Showing posts with label first friday art club. Show all posts

Monday, July 30, 2018

"Our Library Rocks"--Felted!

WE all know that libraries rock, but in 2018--LIBRARIES ROCK! That's the summer reading theme and we are using it to exclaim from the rooftops just how important libraries are to community enrichment.  Since the Southeast Steuben County rocks in the most amazing ways, we asked Shannah Warwick of Blckbts to show us how to felt rocks.
Dyed Wool

We felt for rocks in the park and felt those rocks just needed to be concealed.  Painted rocks are all the rage, but we wanted to clothe our rocks.  Or at least give them a fresh look.


Setting the wool
Each rock got a unique look by taking strips of colored wool, layering it over the rock, then wetting the wool with hot, then cold water.  The heat makes the fibers expand and the cold shocked the fibers back.  This expand and shock treatment causes the fibers to interlock and create a new fiber--FELT.
Rock in Process
Once each rock was completely covered, they were doused in a cold water bath with vinegar.  The vinegar balanced the pH of the wool and soap.  A wet animal smelling rock remains, but after a few hours of drying, it looks like a soft sculpture.
Covered and Cozy
The method was simple.  Hot water, cold water, LOTS OF SUDS, agitation--the kind that releases personal tension, but makes the wool stick in place, and tons of fun conversation made this little colony come to life.
Rock Band

If you need a new way to rock your library, try some wool to felt your sediment.
That felt good
That's a wrap for First Friday Art Club with me.  Check on my Pop-up library excursions in the coming months with a new blog, yet to be named.  Send me your suggestions and I'll work my magic.  In the downtime, follow our newest project, "Family Folklore-A Paranormal Podcast."  Broadcast from the Crystal City of Corning, New York, it is a goosebumpy experience filled with chills and thrills from local residents of the Southern Tier of New York.  Stay tuned for all the fun things to happen.
email your stories to CorningFamilyFolklore@gmail.com

Thanks for visiting!
xo,
Erica


Thursday, June 21, 2018

Potato Printing

We got Totally Tubular in the June First Friday Art Club.  Printmaking is a great way to personalize any surface, but cost of materials can be prohibitive.  Using the power of plants, we had cost-effective printing implements and developed new skills along the way.
Potatoes to Print
In order to make prints, an artist needs a block.  Printmaking blocks are usually made of linoleum or wood.  Linoleum is easy to carve, but expensive to supply for a free library class.  We used linoleum block carving tools to learn the proper way to cut a printing block, but took advantage of the soft surface of potatoes to equate as a printing block.
Careful Carving
Considering the sharp edges of these carving tools, careful carving was required.  We discussed the ideas of positive and negative space and how to get each image exactly as it was desired.  This concept is difficult to grasp, but once achieved, the options are endless.
Ready to Print
Once the potatoes were cut and dabbed on a towel to dry off excess moisture, students were ready to print.  We used flour sack towels as our printing surface.  Mother's Day followed this class, so a ready-made gift was achievable.
Color Palette
We used Folk Art Fabric Paints and paper plates as palettes.  Foam sponges were great for evenly applying paint to the potatoes.  It is advised to dab the potato surface with color rather than paint it on.  Just a bit of color will transfer from the potato surface to the printing surface with a little pressure.
Dab and Press
Once colors were chosen, the process was dab and press for each print made on the fabric.  Composition was considered.  Some students worked random prints across their printing surface.  Others chose to create a border.
Random Placement
Borderline Love
After mastering the dab and press method of printing with potatoes, I showed students the option of multi-colored monoprints.  A monoprint uses a regular printing block, but is treated in such a way that only one of it's kind exists.  By painting each segment of the printing block, a unique print is made.
Monoprint
That's a wrap for our Potato Printing session.  Check back in July to see how "Libraries Rock!"  Guest artist, Shannah Warwick of Blckbts, will instruct students on felting rocks.
This is an event you don't want to miss!


Thanks for visiting.
I'll check you on the flipside in July.
xo,
Erica

Friday, May 25, 2018

May the Fourth

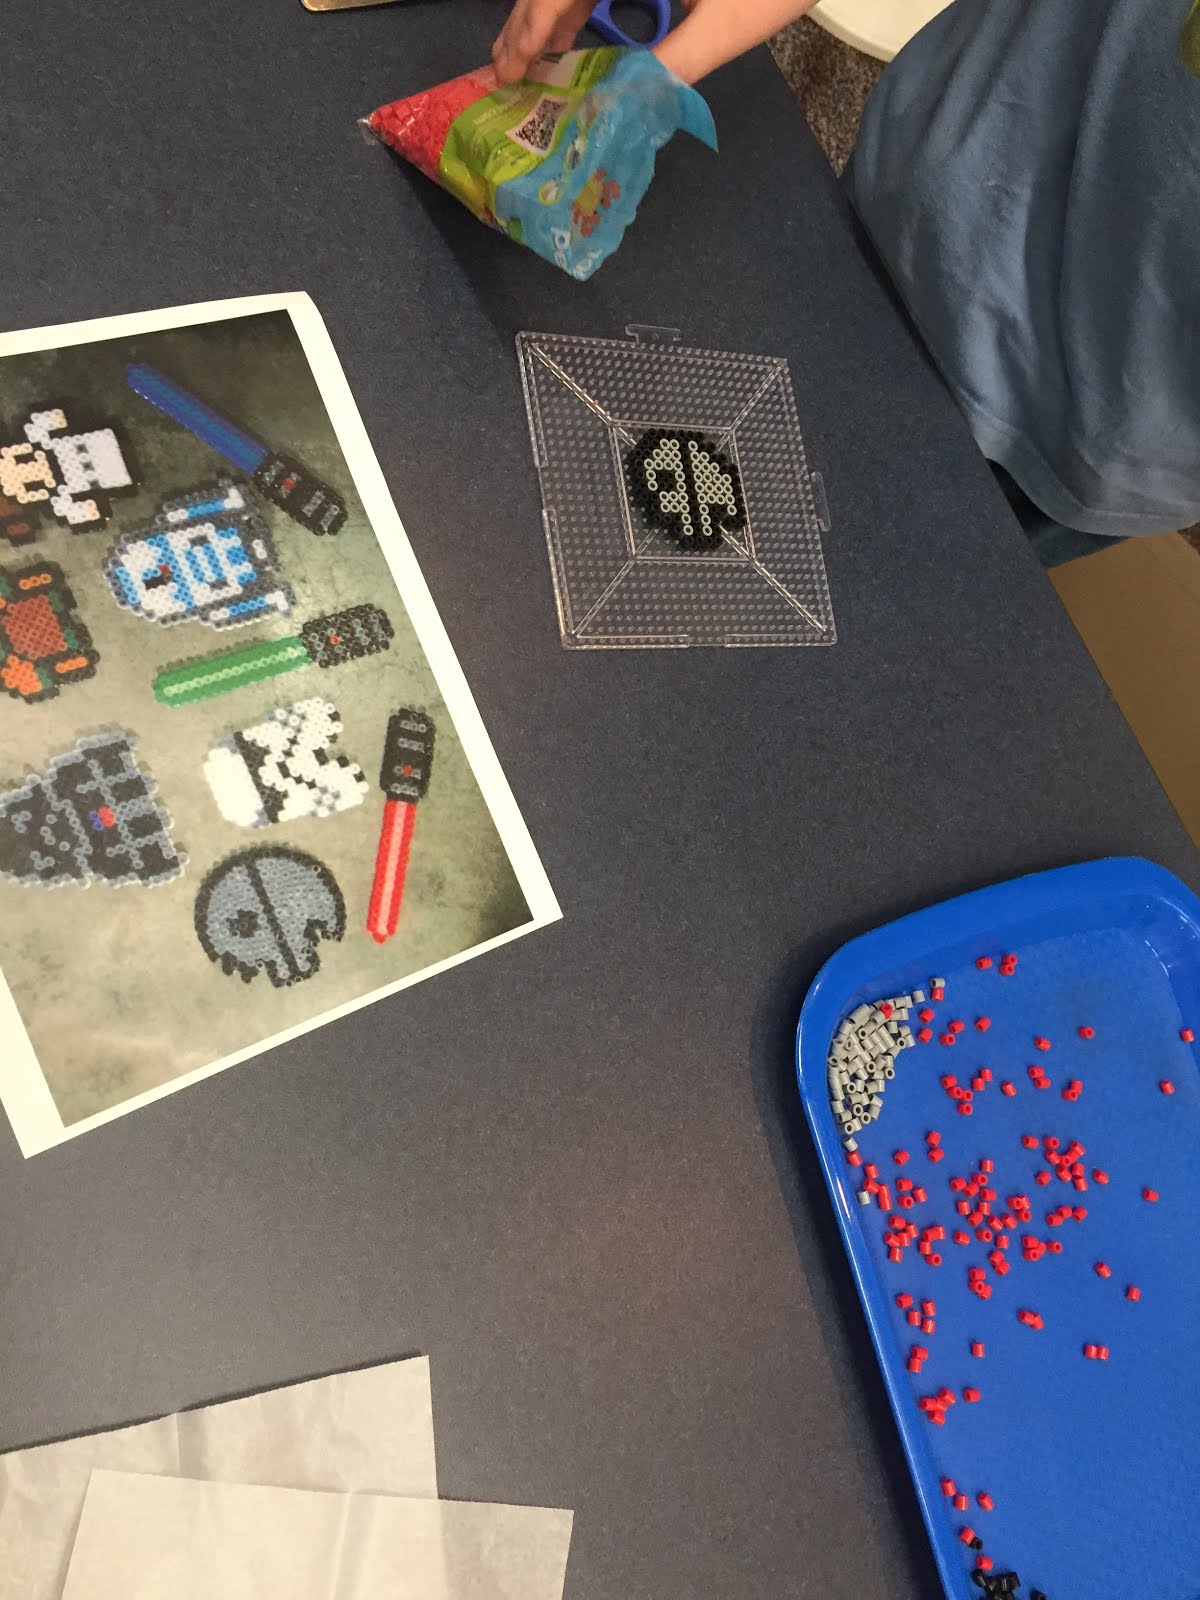
It's everyone's favorite celestial holiday, May the Fourth!  So in Star Wars style, we created fun crafts to celebrate the Lucas Legacy.
Perler R2D2
A local organization donated two large buckets of Perler beads a few months ago, so I have wanted to test the teen waters with this craft.  May Fourth became the obvious answer as I perused the internet for image inspiration.
What is That?
There are so many Star Wars characters and movies, I just can't keep up.  Okay...confession time...I've only eve watched Episode III and half of The Empire Strikes Back, so I leaned heavily on internet inspiration and student explanation.
Finalized Fun
These characters look great with a little attention to color change details.  R2D2 is my favorite!
Light Sabers in Any Color
These colorful light sabers were simple to sample and lots were made in the time we played.

Icy Sabers
For a fun way to cool down the action, we had Icy Sabers.  I used felt and hot glue to create Light Saber Coozies.  This was a great way to send everyone off into the galaxy.
Go Nuts for Donuts
The option to create something non-Star Wars led to this tasty doughnut.  Homer Simpson approves!

This wraps up another First Friday Art Club at the Southeast Steuben County Library.  
Check back in June to see what we've been making!
Totally Tubular!
Let's get Totally Tubular in June by Printing with Potatoes (and possibly some other vegetables).  Printmaking has never been so easy.  See you soon!

May the Force be With You
This message has been Chewy approved.
xo,
Erica


Thursday, February 22, 2018

Acrylic Cats with Filomena Jack

Rainbows of Color
Southeast Steuben County Library's First Friday Art Club encountered acrylic paints, canvas panels, brushes, and a rainbow of color with Filomena Jack in February.
Welcome to Class
Class started with Filomena's introduction to color theory and the color wheel.  Students needed to know how to mix colors to achieve their preferred palette.  Then instruction proceeded to creating whimsical cats.
Start with an inverted Triangle
Using simple shapes and limited rules, students created their feline's features.  Designs were whipped out quickly with this easy-to-follow tutorial.  Once the cats were on the canvas boards, it was time to paint the base color.
This Kitty has the Blues
Painting the base color of the cat body let each personality shine.  Some folks liked lots of colors, while some chose monochromatic schemes.  "This kitty has the blues," my neighboring student mentioned. 
Not just for Cats
Let's admit that cats are not for everyone.  Some of us love bunnies more; Filomena can attest to that!
Meoowwww!
Once the cat's body was painted, the background needed color, then it was on to facial features.
Grumpy Cat
We saw grumpy kitties, happy cats, scaredy cats, and kittens with attitude arise from their creator's brushes.
Content Kitty
Class time passed quickly, but each student left with a complete painting.  Great work to our students, and BRAVO to our instructor!
Pro-Kitty
Can you tell  who created this cool cat!  We obviously have lots to learn from the master.
Printmaking with Organics
Visit us in March to see what beautiful marks we make after Printing with Potatoes.  It's an easy and inexpensive form of printmaking.  Tell me if you've make marks with organic matter.
See you next time!
~Erica

Tuesday, November 14, 2017

Calligraphy Birds & Beasts with Wynn Yarrow


Calligraphy Birds & Bests
First Friday Art Club in November explored the Victorian era folk art of calligraphy animals.  Guest instructor Wynn Yarrow led this program and started the introduction with a Powerpoint presentation.
Sweeping Lines
Students were advised to pay attention to the sweeping lines of each image in the presentation.  There were swirly marks and swishy marks similar to cursive writing.  Some students noted that the marks looked like the Nike symbol.  Wynn handed out inspiration packets, which had printed animal silhouettes .  These silhouettes were easy to trace over blank sheet of paper and create personalized beasts. 
Cats & Dogs
Images of cats and dogs started popping up all over the conference room.  After an image was chosen, it was up to each student to personalize the drawings with the swirly lines we saw in the Powerpoint presentation.  
How do you draw a Peacock?
Students were also welcome to select books from the library collection to help draw a specific animal. Birds were this artist's fancy.

Modern Mouse

It was apparent that some kids had a vision they needed to accomplish.   
This student was fond of a mouse and became fully engaged in decorating her creature with significant calligraphic marks.

I enjoy watching younger students develop their skills.  Drawing is that special skill that everyone struggles with because they always compare with another artist they feel has more talent.  Wynn Yarrow does not allow this comparison in her classes.  There is consistent reassurance that imagery developed by an artist's hands at that moment is the highest skill and best they can do.  "Comparing is not the key to success, just an indication of where we might wish to go."
Monkey Trouble

As birds and beasts were developed in the class, students also learned how to 
create banners with Victorian era proverbs.  Using handouts for inspiration, 
Maggie used her own name to label her drawing.  

The Dragon
The youngest artist in this class finally discovered the joy of drawing.  
Something about this lesson resonated with Alex.  Here he is drawing a Chinese dragon.  When he finished, he boasted, "I feel I have the potential to be an artist!"
Giraffe on Safari
This Giraffe was another success story of the afternoon.  There were several attempts to get that silhouette just right, but Roni forced herself to make it happen without any help.  
Using a library book as reference, she tested patterns on separate paper before utilizing them in her design.  The giraffe's spot are so impressive!
Let me draw RIGHT MEOW!
Having a guest instructor gives me an opportunity to take pictures and record quotes from the students.  There was even enough time for me to draw and test out my own skills.  I had fun trying several styles within the same cat silhouette.

This wraps up another year of First Friday Art Club.  
We host a Make & Bake Gifts program in December in place of Teen Cooking Club and First Friday Art Club.  Space is limited, so sign up today to secure your place to create beautiful and delicious gifts for friends and family this holiday season.
Goodies for the Holidays!
Thanks for visiting.  See you in December!
xo,
Erica


Wednesday, September 20, 2017

Stained Glass Fake-Out

To get students ready for the new school year, I planned a relaxing project for First Friday Art Club in September.  I've seen fake stained glass projects and had them on the "To Do" list for awhile, but a colleague highly suggested this technique, having recently succeeded in the same lesson with a mixed age group.
Blueprints, tracings and color
In order to create a stained glass project, an artisan will create a drawing.  The drawing will then get scaled to the size of the window or project they are creating.  The scaled drawing is called a blueprint and used quite like a blueprint for architecture.  My students were given some time to sketch out a plan for their blueprint using office copy paper.
Careful coloring
Once the blueprint was finalized, each student took wax paper to create their fake stained glass.  I tried to equate the simplified techniques to actual glass preparation.  Students were told to "cut" their glass by tracing their blueprint with pencil onto the less waxy side of the wax paper.  The less waxy side of the paper accepts the marker ink better than the shiny side.  Once their drawing was transferred, color could be added to the composition.
"This part is my favorite."
The coloring phase excited everyone like the coloring pages that have become very popular.  I had some concern that this project would be too simple and quick for this age group, so I planned to let any quick workers make another.  Luckily that was not an issue.  Each student took their time planning their projects and placing the color precisely inside the lines.
Bold lines and Big shapes
I suggested to keep lines and shapes big and less complex.  No glass maker wants to cut sliver sized pieces of glass.  Adding the lead came or copper foiling would make the process almost unbearable.  With that idea understood and coloring wrapping up, each project needed to be taped to a matte board frame with the fake lead came applied afterward. 
Puffy Paint to the Rescue
The lead came replacement for this project was puffy paint.  I showed the option to outline the shapes in each composition with black sharpie, but also showed the puffy paint example and everyone gravitated toward that look.  By framing the wax papers first, the projects were less flexible and easier to take home, even with wet paint. 
Simple instruments
This project is achievable for many age levels and has been proven successful with varied ages in the same class.  Sharpie markers are suggested for their ability to stay and not smudge on the wax paper.  Rulers, copy paper, puffy paint and pencils were other simple instruments used to created this relaxing project.  No glass means no fingers cut!
Hold it up to the Light
Holding these finished projects up to a window let them truly shine. 
Simple and Sweet
Larger shapes to give the viewer's eye more to view would 
make this composition even more lovely.
Simplified Landscape
This artist skipped the black puffy paint at first, but then added it later.  Good choice!
Color every Inch
This artist chose to color every inch of her composition. I feel this was the closest resemblance to stained glass and would love to see it in glass form....
any makers ready to take on that challenge?

This wraps up another month of First Friday Art Club.  Join us in October for harp & heART with Maryalice Little.  There's still time to register!

Thanks for visiting!
~erica