 |
| Cyanotypes, GO! |
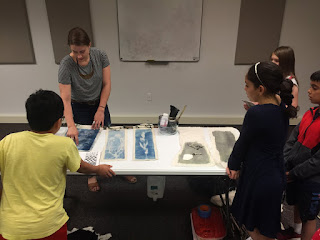
Marnie defined the term cyanotype by breaking down the word. Cyan is blue and type meaning print, so you can say this is like a blue print. Having worked in a blue printing facility, we were lucky to NOT smell the diazo process, which can knock out a person with the ammonia fumes.
 |
| Chemical Overview |
Students who arrived early got a chance to peruse the sample and supply table. Marnie showed interested parents the chemicals which we would use to complete the process. These chemicals are light sensitive, meaning they need to be kept out of sunlight. Since they are hazardous, everyone was instructed to wear gloves while applying the liquid mixture to the fabric being used.
 |
| Safety First when Working |
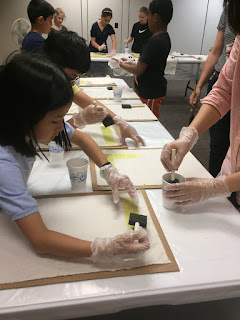
First step in this class was to prepare our fabric with the light sensitive chemical mixture. Using foam brushes, rubber gloves, and table cloths, each student was responsible for this step. We often remind our students that safety is always first when making art. We only get one set of lungs and the skin we're in, so they have to last a lifetime.
 |
| Time to add the Goodies |
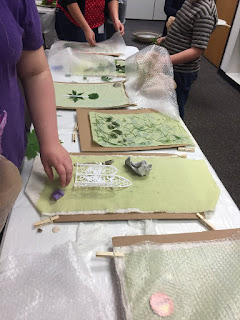
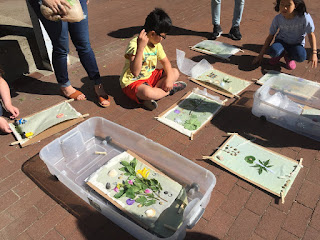
Once the chemical application was dry, it turned a pea-green hue and it was time to get creative. Using items we collected from the garden and an array of interesting shaped goodies, each student took time to compose their image. This required a bit of thinking about positive and negative space, as well as transparent versus opaque density.
 |
| Wrapped and Protected |
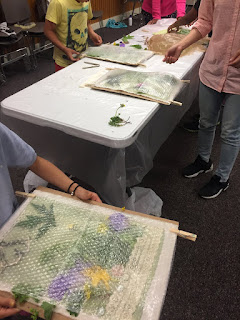
After composing their imagery, the students wrapped up their fabric on a cardboard sheet sandwiched by bubble wrap and secured with clothes pins. There was a whipping wind to contend with outside and we did not want all of the loose items to go flying!
 |
| Waiting for the Sun |
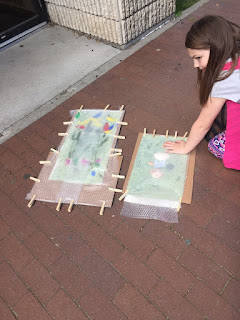
Once outside, the sun was in control of this project.
Each student was a watch-guard protecting their projects from the wind.
 |
| Make your Mark |
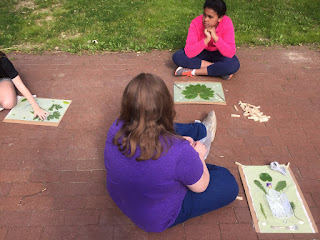
I tested this process and teamed up with a student with a bubble wrap experiment. "What will happen if we leave the bubble wrap on?," we wondered. As the sun processed the image, this student took a chance to use her body as her signature!
 |
| Expose in the Sun for about 10 minutes |
After about 5-10 minutes of bright sun exposure, the chemicals on the fabric turned a slate gray/ green tone and Marnie told us to wash our fabrics in clean water. This was a fast action of tossing materials into bins and rushing to the water tubs to process the image.
 |
| Leaves and Seashells were flying! |
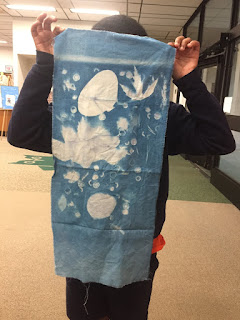
If you can imagine the flock of leaves, seashells, glass nuggets, and macaroni literally flying into storage bins, the mad rush panicked everyone to make sure they finished their projects before the end of class. Washing the fabric in water surprised everyone at how fast the fabric turned from green to blue. The imagery everyone composed was so gorgeous. This project offered immediate gratification. Who doesn't like that?!
 |
| Success |
The variety of blue tones this process offers is quite lovely. I have a blue love-affair and believe I will further explore this process in my home studio. One parent who enjoyed the results of this process envisions a Cyan Family Room. She took notes on the chemicals needed and borrowed some books to further investigate. If you have interest to learn how to make cyanotypes, visit this Alternative Photography for more information.
Check back in July to see what Steampunk Costumes our crew creates as they prepare for the ever-epic Library Unmasked: Steampunk Edition cosplay event.
Until then, thanks for visiting!
~erica


